
Mixing an EDM track requires a delicate balance between energy, clarity, and depth. With “Stay the Night” by Robb, the goal was to create a mix that not only captures the emotional core of the track but also delivers the punch and impact necessary for a standout EDM production. From the pulsating basslines to the shimmering synths, every element had to occupy its own space while contributing to the track’s overall momentum.
In this case study, I will walk you through the detailed process of mixing “Stay the Night,” covering key techniques like gain staging, EQ sculpting, sidechain compression, and stereo imaging. Drawing from my experience as a professional producer, I focused on ensuring that the low-end remained tight and powerful, while the mids and highs retained clarity and warmth. Whether you’re a producer looking to refine your mixing skills or simply curious about the process behind an EDM track, this study will provide valuable insights into achieving a polished and professional mix.
Before Mixing
After mixing
1. Mixing preparation
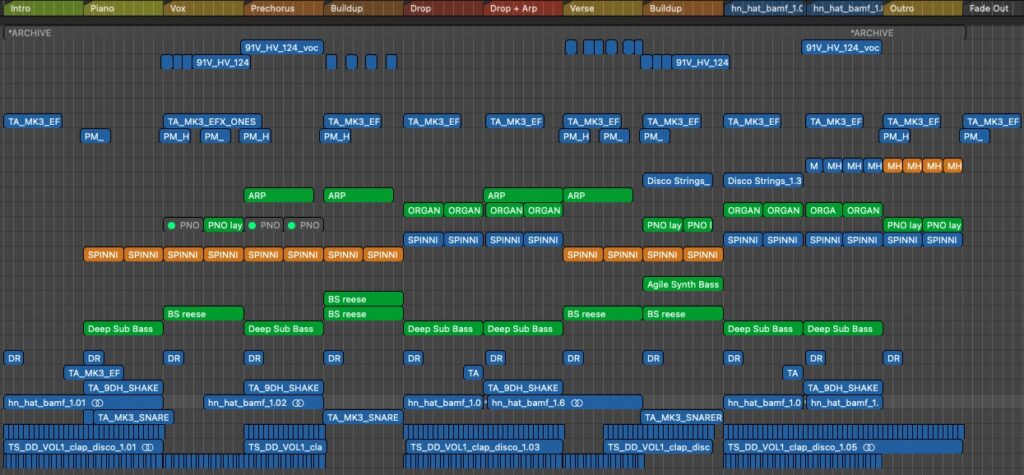
Session Organization
When I start a new mix, the first thing I do is organize the session. After importing all the stems from Robb’s production into my DAW, I label each track clearly—whether it’s the kick, snare, bassline, or lead synth. Having everything labeled right from the start helps me stay efficient and ensures I can find any element quickly during the mix.
Sound Selection & Arrangement
Before I dive into mixing, I always take time to review all the stems. I listen carefully to each sound that Robb sent over, making sure nothing is out of place and everything sounds as it should. It’s important to ensure the quality of the sounds is solid before moving forward, so if something seems off—like a distorted bass or a noisy synth—I’ll clean it up or, if necessary, reach out to Robb for any adjustments.
I also take note of the arrangement of the track. Mapping out where key moments occur—such as drops, breakdowns, or big transitions—helps me know where to focus my energy in the mix. For “Stay the Night,” it’s all about making sure those moments hit with the right impact.
Gain Staging
Once I’ve got everything organized, I start by bringing all the levels down to around -12dB. This is crucial for maintaining headroom throughout the mix. I want to ensure there’s enough space to process each element without running into any clipping or distortion issues later on.
I check each stem to make sure nothing is peaking and that everything is balanced at this initial stage. Starting with lower levels gives me the flexibility I need to push certain elements later without worrying about distortion. It also leaves plenty of room for the mastering process, so the final product can be loud and polished without compromising quality.
2. Drums and Percussion
Kick Drum
I always start with the kick when mixing drums, especially in an EDM track like “Stay the Night.” The kick needs to have that solid, low-end punch that drives the energy of the track. To achieve this, I use a combination of compression and EQ. I make sure to compress the kick just enough to control its dynamics without losing any of the weight. Then, I use EQ to boost the low end and carve out space for the sub-bass, ensuring they work together without clashing.
Snare/Clap
For the snare and clap, my main goal is to shape the transients so they hit hard without overpowering the mix. I start with compression to enhance the attack, giving the snare that snap and punch it needs to cut through. I also add a touch of saturation to give it some extra warmth and character, helping it stand out without sounding too harsh.
Reverb plays a big role here too. I use a short, tight reverb to add depth and space to the snare, making it feel more dynamic and natural within the mix. For “Stay the Night,” I made sure the snare and clap had a nice balance of impact and ambience, ensuring they complement the track’s energetic vibe.
Hi-Hats and Cymbals
The high frequencies are just as important, and managing the hi-hats and cymbals is all about controlling those highs without making them too piercing. I start by EQing out any unwanted harshness in the top end and boosting the frequencies that add crispness and clarity.
3. Bass
Deep Sub Bass
The sub-bass is the foundation of the low-end in “Stay the Night,” so my priority is making sure it feels deep and powerful without overwhelming the mix. I start by isolating the lowest frequencies with EQ, making sure the sub occupies its own space around the 30-60 Hz range. To keep it tight and controlled, I apply subtle compression, ensuring that the bass remains consistent throughout the track without any wild fluctuations in volume.
One of the key techniques here is sidechain compression. I sidechain the sub to the kick to ensure they don’t clash and to allow the kick to punch through clearly. This technique helps maintain the groove while giving the sub-bass that deep, rumbling presence that’s crucial for an EDM track.
Reese Bass
The Reese bass is where I add texture and movement to the low-mid frequencies. This type of bass adds a gritty, wide feel, giving the track more character. I start with some EQ to carve out space between the Reese bass and the sub, focusing on the 100-300 Hz range to let the Reese fill in the body without competing with the deeper sub frequencies.
Synth Bass
The synth bass plays a more melodic role in “Stay the Night,” sitting higher in the frequency spectrum. My main focus here is ensuring that the synth bass cuts through without overpowering the midrange elements like vocals or synth leads. I use EQ to emphasize the mids and highs, shaping the sound to sit clearly above the sub and Reese basses.
4. Synths and leads
Piano
The piano sample in “Stay the Night” forms a key harmonic foundation, and my goal is to ensure it has a warm, full-bodied presence without getting in the way of other elements. I start with some light EQ to boost the low-mids for warmth and clarity, and cut any unnecessary low frequencies to avoid muddiness with the bass.
The piano layer adds thickness and texture to the main piano sound, so my focus is on blending it smoothly. I usually EQ this layer slightly differently than the main piano to avoid any frequency clashes. I’ll boost the highs and upper mids a bit to add sparkle and presence, making sure it complements the main piano without competing for the same space.
Arpeggio Synth
The arpeggio synth plays a key rhythmic role in the track, adding movement and momentum. I want it to sit above the lower elements like bass and drums, so I use EQ to focus on the high mids and highs, cutting out any low frequencies that might muddy up the mix.
Organ
The organ adds richness and harmonic depth, so I focus on making sure it fills out the midrange without clashing with the other synths. I usually start by carving out some space for it in the mids, giving it a warm, rounded sound. A subtle boost around 500-700 Hz brings out its character, while cutting any unnecessary lows prevents overlap with the bass.
Strings
The strings bring an emotional, cinematic feel to the track, and I want them to soar without becoming too harsh or overwhelming. I use EQ to emphasize the upper mids and highs, giving the strings a bright, airy quality. At the same time, I roll off some of the low end to keep them from clashing with the bass and piano.
5. Vocals
The vocal sample in “Stay the Night” serves as a key emotional driver of the track, and my goal is to make sure it cuts through the mix while retaining warmth and clarity. I begin by EQing the vocal to remove any unnecessary low-end rumble, typically rolling off frequencies below 100-150 Hz. This clears up space for the bass and kick, allowing the vocal to sit neatly in the mix without clashing with the lower frequencies.
Next, I focus on enhancing the presence of the vocal. I’ll often boost the upper mids around 2-5 kHz to give it that clarity and brightness that ensures it stands out without being too sharp. At this stage, I also check for any harsh frequencies, using a dynamic EQ or de-esser to tame sibilance or any piercing sounds that might occur around the higher mids.
Compression and Dynamics
To keep the vocal sample consistent throughout the track, I use compression to even out the dynamics. The goal here is to maintain the vocal’s energy while avoiding any sudden jumps in volume. I apply moderate compression with a relatively fast attack to control the transients, but I’m careful not to over-compress, as I still want the vocal to feel natural and emotive.
Reverb and Delay
Reverb and delay are key to placing the vocal in the mix without losing its intimacy. I typically use a plate reverb to give the vocal a smooth, airy quality, but I’m careful not to overdo it, as too much reverb can make the vocal feel distant. A short, subtle delay helps create depth and space around the vocal, especially during key moments like builds or drops.
6. Fx and transitions
The FX and transitions in “Stay the Night” are crucial for maintaining the flow and energy of the track, ensuring that each section feels seamless and impactful. My goal here is to blend these elements into the mix in a way that enhances the listener’s experience without drawing too much attention to them individually. Properly placed FX elevate the transitions, creating tension, release, and smooth shifts between different parts of the song.
7. Final mix
As I approach the final stages of mixing “Stay the Night,” my main objective is to ensure that all elements work together cohesively and that the track delivers the emotional and energetic impact it’s designed for. At this point, it’s about fine-tuning the balance, polishing the overall sound, and making sure everything translates well across different playback systems.
Balancing the Mix
In the final mix, I go back and check the levels of all the elements to make sure each one sits perfectly in the mix. It’s crucial to find the right balance between the low-end (kick, sub-bass), mids (synths, vocals, bass layers), and highs (hi-hats, cymbals, FX). The key is to avoid any one element overpowering the rest, keeping the mix clean and dynamic.
I reference the mix against different tracks to ensure the overall level and tonal balance are competitive with similar EDM productions. I also double-check the stereo image to make sure the panning creates a sense of width and space while keeping important elements like the kick, snare, and vocals centered for impact.
Compression and Glue
For cohesion, I like to apply subtle bus compression on the drum and synth groups to “glue” the elements together, giving the track a more unified sound. The bus compression helps to tame any peaks and smooth out the dynamics across sections, particularly in EDM where the energy builds and drops multiple times.
At this stage, I also fine-tune the compression settings to maintain punch and presence without losing dynamics. The idea is to control the energy but still let the track breathe, especially in the drops.
Referencing and System Checks
At this point, I test the mix on different systems—studio monitors, headphones, and smaller speakers—to ensure it translates well across different environments. I listen for any imbalances or elements that might be too loud or too quiet on certain systems.
I also compare the track to industry-standard references to ensure it’s competitive in terms of loudness and tonal balance. This helps me make final adjustments before preparing the mix for mastering.